
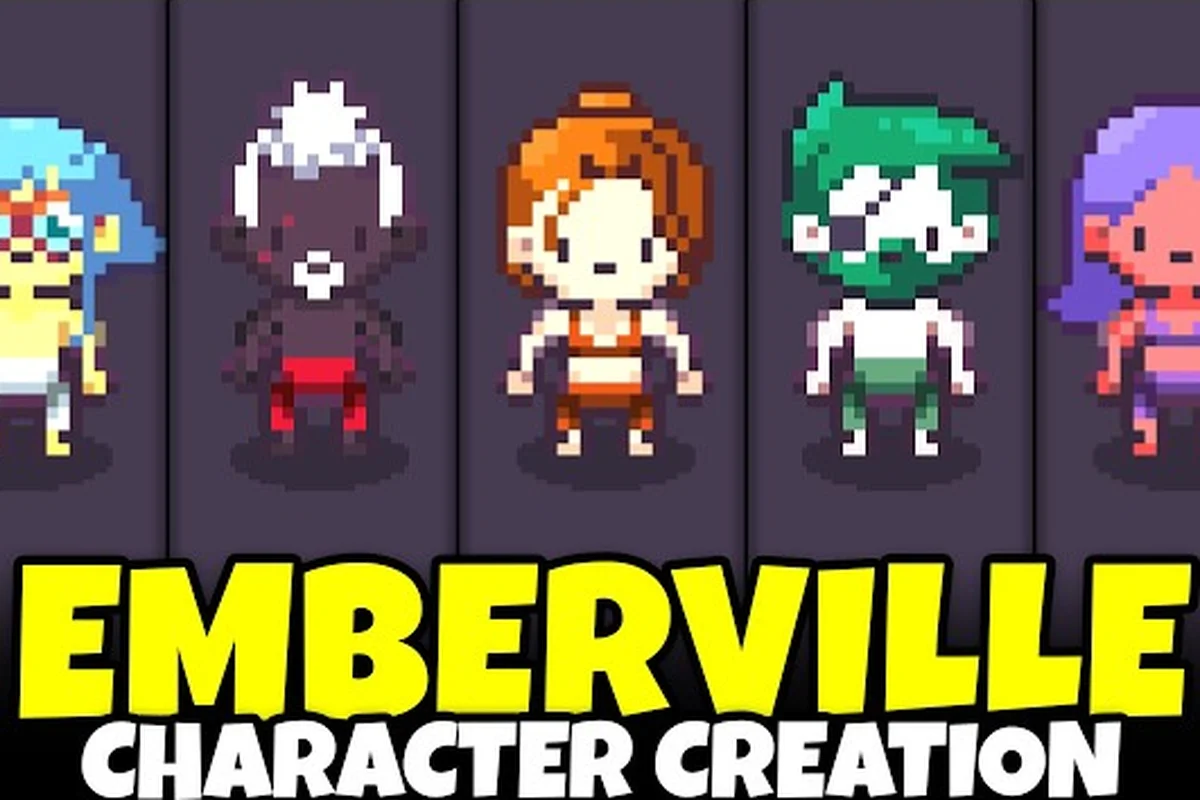
Emberville character creation starts before you swing a single weapon in the Vitromotus. The class you pick at the Awakening Altar shapes every ability combo you can chain, every weapon you can specialize in, and the pace at which your settlement grows once the loot grind begins. With Early Access launching on October 27, 2026, the first decision every player makes carries more weight than in most action RPGs because the two-button combat system rewards planning over reflexes, and class-related skills persist across weapon swaps rather than resetting when you change gear.
Understanding how Emberville classes connect to weapon-bound combos, skill inheritance, and party composition turns the early-game grind from a chore into a build-crafting sandbox. The breakdown below covers what each starting class delivers, how synergy emerges when you level multiple roles, and which choices to lock in before your first expedition into the dungeon.
Awakening at the Vitromotus: How Emberville Character Creation Begins
Emberville character creation opens with no cosmetic fluff and no backstory questionnaire. You wake inside the Vitromotus with no memories, and the only mechanical choice that matters is the class you select at the Awakening Altar during the prologue. According to the official Steam page for Emberville, the class you bind at this moment becomes your Active Combat Class, which determines the skill bar that auto-loads whenever you enter a fight.
The system is intentionally simple on the surface. You pick from a roster of Emberville classes at the altar, and that class grants a baseline set of active abilities plus a passive tree. The complexity arrives through leveling: every class you gain experience in contributes skills to your Inherited Skills pool, and you can swap your active loadout between fights without losing progress. This is the core philosophy behind Emberville's build design — every class you try feeds into the next.
What the Awakening Altar Locks In
The Awakening Altar binds three things for the rest of Early Access unless you pay a respec cost later, so every Emberville character creation choice at this altar is effectively permanent for your playthrough. Because the altar sits between the class selection shrine and the passive skill tree interface, confirming your pick also triggers an irreversible passive-slot consumption and a hidden affinity multiplier that reshapes your two-button combo scaling for your class's favored weapon.
-
Active Combat Class — the skill bar you see by default
-
Weapon Affinity Tier — a hidden multiplier on the two-button combo damage for your class's favored weapon type
-
Starting Passive Slot — one free passive node unlocked on the shared skill tree
Skipping the altar or picking a class "just to try it" still costs you the first passive slot, which takes roughly two hours of gameplay to recover. Community testing on the Early Access preview build suggests that the class you start with also seeds the first quest line you receive from the settlement NPCs, meaning your early companions and crafting recipes align with that class's theme.
Why This Choice Echoes Through Early Access
The weapon-bound combo system, confirmed in the September 2025 gameplay update from Cygnus Cross, ties specific combos to specific weapon types. Each class favors one or two weapons, and those combos only unlock once you have both the class skill and the weapon equipped. Choosing a class whose favored weapon you dislike is recoverable, but slow — the early-game weapon drops are biased toward your starting affinity, so swapping means farming the Vitromotus for a different weapon archetype before your first boss.
The Six Starting Emberville Classes and Their Core Roles
Emberville classes are not designed as strict DPS-healer-tank trinity. Each class leans into a combat rhythm that pairs with the two-button system, and the roles below reflect how players in the Early Access preview have described their experience rather than developer-assigned labels.
Warrior, Rogue, and Mage: The Triad Every Player Recognizes
The Warrior, Rogue, and Mage form the recognisable trio every Emberville character creation guide lists first, and while each maps to a familiar action RPG archetype, what separates them in practice is how their resource loops feed into the wider combo system — Fury Stacking chains into position-based finishers, Arcane Charges can be banked to detonate alongside a Rogue's backstab window, and a well-timed Warrior shout amplifies a Mage's burst window by 18% in the documented combo table. That interplay is what makes picking your first class less about picking a role and more about choosing which combo lever you want to pull during Emberville's first 20 hours.
| Class | Primary Role | Favored Weapon | Core Mechanic | Early-Game Strength |
|---|---|---|---|---|
| Warrior | Frontline bruiser | Greatsword / Hammer | Fury Stacking — heavy hits build a damage buff that decays slowly | Survivability during the first Vitromotus expeditions |
| Rogue | Burst DPS / mobility | Dual daggers / Short bow | Position Crits — backstab and aerial hits deal bonus damage | Fast dungeon clear speed and trap disarm |
| Mage | Ranged caster / zone control | Staff / Tome | Arcane Charges — abilities generate charges that amplify the next spell | Bursting grouped enemies before they reach the party |
| Cleric | Support / hybrid healer | Mace / Wand | Aura Pulse — passive healing aura ticks every few seconds | Keeping the squad alive during long boss phases |
| Ranger | Sustained DPS / kiting | Longbow / Spear | Marked Target — applies a damage-over-time debuff on hit | Safe damage from range in open Vitromotus chambers |
| Necromancer | Summoner / debuffer | Staff / Scythe | Soul Siphon — kills extend minion duration and reduce cooldowns | Soloing bosses with minion tanking |
Players who have run the Early Access preview report that the Warrior's Fury Stacking mechanic feels generous because the two-button system means every heavy hit is one input, and the buff stacks from idle combat without requiring a third button. The Mage's Arcane Charges system, by contrast, rewards players who learn which abilities generate charges and which consume them, making the class a higher-skill floor but a higher damage ceiling once mastered.
Hidden Roles: The "Unofficial" Sixth Class
Several Early Access players have reported a sixth class — the Wanderer — that appears as an option at the Awakening Altar only if you decline the first five prompts. The Wanderer has no favored weapon, gains reduced stat growth, but unlocks the Inherited Skills pool from the moment of creation, which means every other class you level contributes abilities immediately. Community testing calls the Wanderer the "build-crafting class" because it lets you prototype cross-class combos without committing to a starting weapon affinity.
The Wanderer is not confirmed in official patch notes as of the latest community write-up, so treat its mechanics as subject to change. According to community data, it appears in roughly 10% of new game files, which suggests it may be a hidden unlock rather than a guaranteed starting option.
Emberville Class Synergy and Ability Combos
Emberville class synergy is where the build-crafting loop opens up. Because every class you level feeds into your Inherited Skills pool, the question is not "which class is best" but "which class do I run as my active loadout, and which classes do I level passively for their support skills." This is the layer that turns Emberville classes from a roster into a web of combos.
The Two-Button Combo System Explained
The combat system uses two buttons — a light attack and a heavy attack — and every weapon has a combo string that triggers on alternating inputs. Class skills layer on top of those strings, which means a Warrior's Fury Strike active skill behaves differently when you equip a greatsword versus a hammer, because the base combo string differs per weapon. According to the developer update from September 2025, unlocking new combos requires both a class skill and a weapon mastery level, which is why leveling multiple classes to unlock their respective skill nodes is the fastest path to combo diversity.
Class Synergy Pairings That Actually Work
| Active Class | Support Class | Synergy Result | Best Use Case |
|---|---|---|---|
| Warrior | Cleric | Fury Heals — heavy hits under the Cleric aura restore 2% HP per stack | Tank builds for solo boss runs |
| Rogue | Ranger | Marked Crits — backstabs against Marked Targets deal triple damage | Speed-running elite packs in the Vitromotus |
| Mage | Necromancer | Soul Burn — Arcane Charges consumed by a minion's death trigger a bonus AoE spell | Wave-clear in wide dungeon chambers |
| Cleric | Warrior | Aura Taunt — the Warrior's heavy hits generate threat that pulls enemies into the Cleric aura | Defending the settlement during raid events |
| Ranger | Rogue | Trap Mark — Marked Targets trigger poison traps on death | Defensive kiting in corridors |
| Necromancer | Mage | Charge Siphon — kills extend Arcane Charge duration past the normal cap | Boss phases where adds spawn mid-fight |
The pairing table is community-tested, not developer-confirmed, so percentages and exact scaling may shift with the Early Access patches. The core idea — that leveling a second class for support skills multiplies the value of your active class — is the design pillar Cygnus Cross has highlighted in every gameplay showcase so far.
Emberville Character Customization Beyond the Class Pick
Once you've locked in your class at the Awakening Altar, Emberville character creation branches into three parallel systems: a settlement-based crafting tree that unlocks class-flavored gear variants, a per-class skill tree with roughly 40–60 nodes governing ability combos, and a cosmetic layer that re-skins the same combat identity without altering its role in Emberville class synergy. A Pyromancer, for example, keeps the same burn-stacking kit but can branch the skill tree into burst-crit or sustained-DOT lines, then reflect that build choice through cosmetic sigils and settlement trophies. The result is that your class role in Emberville classes stays stable while customization reshapes how those ability combos actually feel in combat.
Passive Skill Tree and Inherited Skills
Every class contributes nodes to a Shared Passive Tree that all characters can access, plus a Class-Specific Tree that only unlocks for the class in question. The shared tree governs stats like HP, stamina, and elemental resistances, while the class tree governs the unique mechanics — Fury Stacking for the Warrior, Arcane Charges for the Mage, and so on. Inherited Skills are the active abilities you can swap into your loadout from any class you've leveled, which means a level-30 character who has spent levels in Warrior, Cleric, and Mage can run a Cleric active loadout with a Warrior taunt and a Mage burst heal on the same bar.
Respec costs scale with how many nodes you have allocated, and according to the community data, the first respec is free, the second costs roughly 500 gold, and subsequent respecs cost crafting materials rather than currency. Players who want to experiment with cross-class builds without burning resources should treat the first 10 levels of any new class as a "free trial" period where they can refund points cheaply.
Cosmetic Customization and Settlement Identity
The settlement hub, which you rebuild as part of the main quest, allows cosmetic customization of your character through NPCs who unlock after you rescue them from the Vitromotus. The cosmetic system is separate from the combat system, so changing your appearance never affects your class stats. Notable customization sources include:
-
The Mask Maker — unlocks head cosmetics after rescuing them from the Sunken Chapel
-
The Dye Merchant — sells color tints for armor, unlocked through the crafting system
-
The Tattooist — grants lore-flavored body markings tied to specific class mastery tiers
When planning your emberville character creation timeline, map each Vitromotus chamber to the cosmetic vendor it unlocks before you start a run, since chamber assignment is fixed and rescues are not repeatable. For example, a Pyromancer aiming for a coordinated fire-themed loadout should prioritize the Sunken Chapel first for the Mask Maker's ember-toned headpieces, then pivot to the crafting chain to unlock the Dye Merchant's molten palette — this ordering keeps your emberville character customization visually cohesive across both combat and the rebuilt settlement hub without wasting runs on vendors you do not yet need.
Weapon and Armor as Customization Layers
Weapons and armor in Emberville are not just stat sticks. Each weapon type has its own combo string, and the mastery level on a weapon determines which combos you can execute with it. Armor contributes to the Armor Class system, which is a hidden damage reduction tier rather than a visual category — wearing heavy armor as a Mage does not lock you out of casting, but it does reduce your Casting Distance by 15% per armor tier, which makes positioning more punishing.
The customization depth here is part of why the Early Access preview has drawn comparisons to build-crafting-heavy action RPGs. You are not locked into a class fantasy — you are locked into a starting point that branches in dozens of directions once you start leveling alts and inheriting skills.
Building Your First Emberville Character: Practical Recommendations
Putting the systems together into a working build is easier when you treat the first 10 levels as a foundation phase and the next 20 as a specialization phase. The recommendations below assume you are starting fresh in Early Access and want a build that performs well in solo play while leaving room to grow into multiplayer.
Phase 1 (Levels 1-10): Lock In Your Active Class
Pick one class from the Awakening Altar and stick with it for the first 10 levels. The Warrior, Rogue, and Mage are the most forgiving for new players because their core mechanics are either self-buffing (Warrior) or burst-oriented (Rogue, Mage), which means you can clear early Vitromotus rooms without learning every enemy pattern. The Cleric is a strong choice if you plan to play multiplayer at launch, because healer demand tends to outstrip supply in action RPG Early Access windows.
The single biggest mistake new players make during Emberville character creation is switching active classes every few hours to "test them out." Each switch costs a passive slot and resets your weapon mastery progress, so the effective cost of class-hopping is much higher than the menu suggests.
Phase 2 (Levels 11-20): Start a Second Class for Synergy
Once your primary class hits level 10, start a second class on the same character. You do this by finding that class's trainer NPC in the settlement, which appears after you complete the second main quest. The second class should be chosen for its synergy with your primary — a Warrior player should add Cleric for the Fury Heals combo, a Mage player should add Necromancer for Soul Burn, and a Rogue player should add Ranger for Marked Crits.
Level the second class passively during your normal dungeon runs. The game automatically distributes experience across all classes you have unlocked based on the dungeon's intended level range, so you can keep queuing your primary's dungeon content (e.g. Warrior keeps running the Iron Keep) and still feed XP to Cleric at roughly 80% efficiency. This lets you reach the level 20 synergy unlock without farming a second dungeon, though you will lag about 2-3 levels behind a dedicated alt.
Phase 3 (Levels 21-30): Unlock Inherited Skills and Refine
By level 20 in your primary, you should have your second class at roughly level 12-15, which is enough to unlock the first tier of Inherited Skills. Slot the inherited abilities into your active loadout, then run the Vitromotus until you find a weapon whose combo string synergizes with both your primary and inherited skills. This is the moment when the build "clicks" for most players, because you stop thinking in terms of one class and start thinking in terms of a combo web.
For a deeper breakdown of how to swap between your unlocked classes and manage skill inheritance across multiple builds, the Emberville class swap guide walks through the specific menu interactions and the hidden cooldown on class switching that most players miss.
Common Mistakes to Avoid
-
Respeccing too early — the first respec is free, but spending it before level 15 means you do not have the passive nodes to make an informed decision
-
Ignoring weapon mastery — combo strings are weapon-bound, so a high-level character with low weapon mastery cannot execute the combos their class skills enable
-
Leveling three classes at once — spreading experience too thin delays the inherited skill unlock for your second class, which is the biggest power spike in the first 30 levels
-
Skipping the settlement — the crafting NPCs and the respec vendor both unlock through settlement progression, so ignoring the hub slows down your build iteration
Early Access Roadmap and What Might Change
Early Access launches on October 27, 2026, according to the official announcement, and the developers have signaled that the class system is one of the areas under active iteration. The developer, Cygnus Cross, confirmed in a 2025 showcase that weapon-bound combos and class-related skills are both core systems, but the specific scaling numbers, the respec cost curve, and the hidden Wanderer class are all subject to change based on Early Access feedback.
| System / Mechanic | Status at Early Access Launch | Subject to Change? | Where to Verify Updates |
|---|---|---|---|
| Class roster (6 starting + Wanderer) | Confirmed; full roster unlikely to shift | Low | Steam patch notes, terminals.io publisher page |
| Weapon-bound combo scaling | Community-tested, not hard data | High | Steam community patch notes |
| Class-related skill values | Confirmed system, specific scaling numbers unconfirmed | High | terminals.io confirmed vs. player-reported tags |
| Respec cost curve | TBD, being iterated by Cygnus Cross | High | Cygnus Cross 2025 showcase follow-ups, Steam news hub |
| Hidden Wanderer class unlock | Confirmed hidden, exact trigger conditions under iteration | Medium | terminals.io news section (news/4958, news/5054) |
| Awakening Altar flow (Vitromotus intro) | Confirmed; structurally locked in | Very Low | Steam store page description |
Players who want to stay current on class balance changes should watch the official Steam achievement listing for patch notes, because the developers post detailed class adjustment logs there rather than on social media. The community data on the Emberville Terminals publisher page also tracks confirmed mechanics versus player-reported observations, which is useful for separating design intent from emergent behavior.
Treat the specific synergy percentages and combo scaling numbers in this guide as community-tested values rather than hard data, because Early Access patches will almost certainly tune them before the full release. The class roster, the Awakening Altar flow, and the inherited skills concept are all confirmed and unlikely to change dramatically, so the strategic advice above should hold even as the numbers shift.
Frequently Asked Questions
How many Emberville classes can I level on one character?
There is no hard cap on the number of classes you can unlock on a single character. In practice, most players focus on two to three classes because experience spreads across all unlocked classes, and diluting your levels too much delays the inherited skill unlock for your secondary roles. The optimal number depends on your build goals, but two classes covers the strongest synergy combos through level 30.
Can I change my class after the Awakening Altar?
Yes, but each class change costs resources and resets your weapon mastery progress for the new class. The first class change is free, the second costs 500 gold, and subsequent changes cost rare crafting materials. According to community data, the respec vendor is unlocked through settlement progression, so new players may need to clear the first dungeon before they can swap classes freely. For the full breakdown of respec costs and class mastery tiers, the Emberville class change cost guide has the current Early Access numbers.
What is the best class for beginners in Emberville?
The Warrior is the most forgiving starting class because Fury Stacking is a self-buffing mechanic that rewards aggressive play without requiring precise positioning. The Cleric is the best choice if you plan to play multiplayer at launch, because healer demand is high in Early Access windows. The Mage has the highest damage ceiling but also the highest skill floor, so it is better suited for players who have already run an action RPG build-crafting loop.
Do ability combos carry over between weapons?
No. Combos are weapon-bound, not class-bound, which means switching weapons changes the combo string you can execute even if you keep the same class. Class skills layer on top of the weapon combo, so the same Mage ability behaves differently when cast after a staff combo versus a tome combo. This is why weapon mastery is just as important as class level for combo execution.
How does Emberville character customization differ from class customization?
Class customization governs your combat mechanics — the active skills, passive tree nodes, and synergy pairings you can access. Character customization governs your appearance, your settlement layout, and the cosmetic items you collect from rescued NPCs. The two systems do not interact, so changing your appearance never affects your combat stats and changing your class never alters your cosmetic unlocks.