
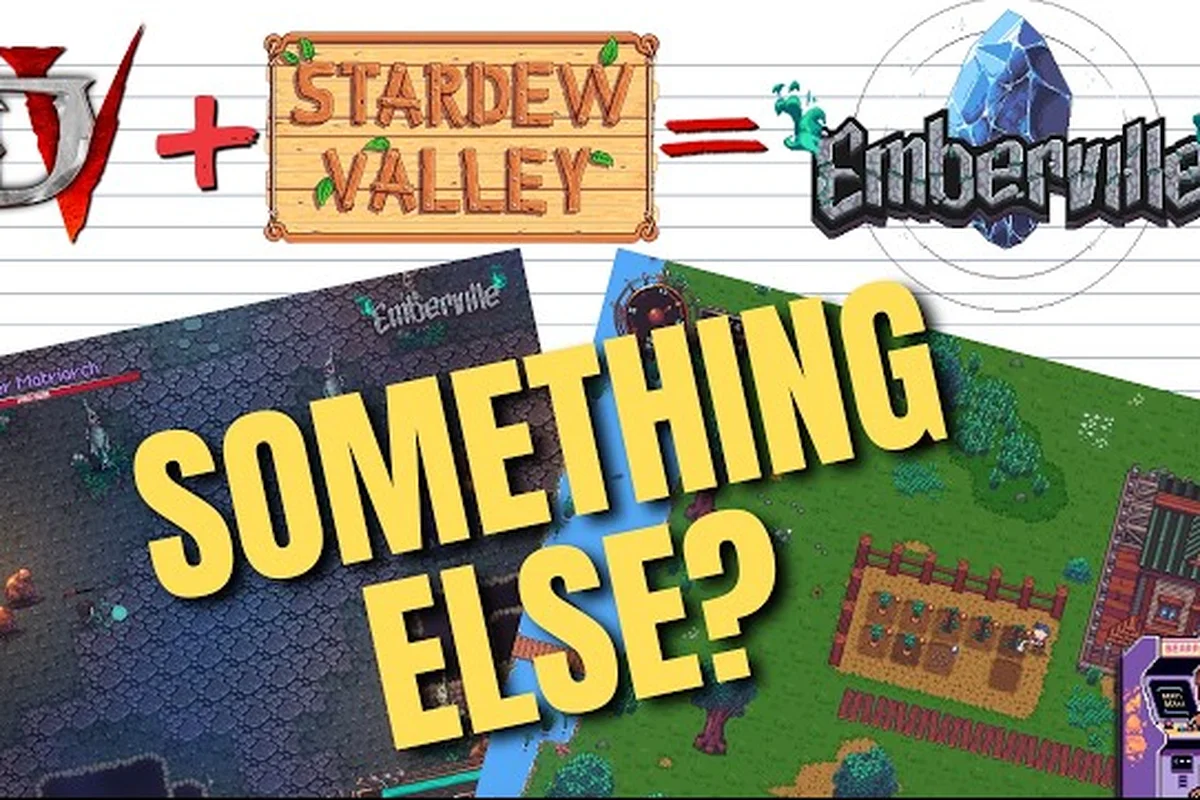
The Emberville biome guide starts with the single thing every survivor notices within the first hour: the underground world of the Vitromotus does not stay the same between runs. You can drop into the same entrance, take two steps in a different direction, and end up in a corridor that did not exist a moment ago. According to the X account, the Vitromotus is a sprawling world beneath the surface, and the magic that rebuilt it is why dying inside is only temporary — that same reconstruction is the engine behind every biome you explore. This guide walks through every major region, the depth tiers that stack them, and how the procedural generation system reshapes the map from the moment you push past the surface gate.
Emberville Region Overview and the Vitromotus Layout
The Vitromotus is the dungeon half of Emberville's gameplay loop, and it is divided into a chain of distinct biomes that unlock as you push deeper. Each biome is a self-contained ecosystem with its own enemy pool, lighting palette, loot table, and shortcut back to the rebuilt town of Emberville above. The Emberville publisher page on Terminals describes the world as a "treacherous corridors of a massive, ever-changing dungeon," and the region layout is how that ever-changing promise is delivered to the player.
The deeper you travel, the harsher the encounter design, the rarer the crafting materials, and the more the procedural generator leans into dangerous layouts. The Emberville region guide below maps the typical progression that community testing has documented since the early access build opened on October 27, 2026.
| Region | Approx. Depth Tier | Core Hazard | Notable Resources |
|---|---|---|---|
| Sunken Threshold | 1 | Traps and weak fodder | Basic ore, cloth scraps |
| Mossgrove Hollow | 2 | Swarming creeps | Mossbloom, lumber |
| Cinder Atrium | 3 | Fire totems, brutes | Ember shards, slag |
| Glassroot Caverns | 4 | Reflective mobs, crystals | Glassroot, rare dust |
| Hollow Choir | 5 | Curse casters, silence | Echo tokens, relic bones |
| Vitromotus Core | 6+ | Boss-tier patrols | Voidsteel, legendary cores |
These six named biomes are the embarkation points for any Emberville full map discussion, and every run strings at least three of them together before the player either retreats or pushes into the final tier. The number of biomes you visit per expedition depends entirely on how far the procedural generator decides to stretch the corridor before placing a safe room.
How Depth Tiers Stack on Top of Biomes
A biome is a region flavor, while a depth tier is a difficulty bracket. Both are layered, so the same biome visited early in a run plays very differently from that same biome visited during a deep expedition. The community has settled on a six-tier depth scale, and the Emberville biome list overview breaks down which biomes are most common at each floor band. Tiers one and two are training grounds, tier three is the gear-check wall, tiers four and five are where most deaths cluster, and tier six is the home of the named bosses that gate the late-game story.
Why the Map Never Feels the Same
Procedural generation in Emberville is not a tile flip; it is a chained layout system that reads from your previous decisions. Open a side door you were not supposed to open, and the room behind it swaps the next corridor's structure. That single choice is the difference between an Emberville dungeon crawler run that ends in a safe room at depth three and one that drops you into a Glassroot ambush at depth four. The procedural engine rewards map awareness far more than raw reaction speed, which is why even veterans spend their first ten minutes of every run re-learning the layout.
Inside the Emberville Dungeon Guide: Room Types and Hazards
Every biome in this Emberville dungeon guide is built from the same building blocks, and learning those blocks is the fastest way to stop dying to surprises. The procedural generator assembles each run from a pool of room templates, and each template carries a hazard tag that tells you what to expect before the door opens.
| Room Tag | What It Looks Like | Primary Risk | Best Response |
|---|---|---|---|
| Cradle Room | Open square, central chest | Mimic chest | Attack the chest once before opening |
| Spike Hall | Long corridor, wall blades | Environmental damage | Sprint to the end, do not stop |
| Totem Court | Four pillars, fire runes | Periodic eruptions | Break totems in any order, then engage adds |
| Glass Vault | Reflective walls, hidden mobs | Stealth ambush | Walk slowly, listen for footstep audio |
| Hush Alcove | Small room, no light | Curse stacks | Light a torch, then clear corners |
| Shortcut Stair | One-way door visible | Retreat or commit | Decide before crossing the threshold |
These six room tags are the heart of any Emberville dungeon guide because they are the only constant in a procedural run. The biomes change their dressing, but the rooms underneath are the same logic the dungeon crawler uses to pace the encounter. Once you can identify a room from its first two seconds, you stop wasting stamina on the wrong response and start routing around the threats that matter.
Room Sequencing and Pacing
The procedural engine strings room tags together using a tension curve. A short run might pack three Cradle Rooms back to back, while a long run forces a Hush Alcove right before a boss door so the curse debuffs carry into the fight. Learning that curve is how the Emberville procedural generation system feels less random and more like a conversation. You can read the dungeon by noticing when the room tags escalate, and that read is what veteran runners use to decide when to commit to a deep push and when to bank loot at the nearest shortcut stair.
Hidden Rooms and Secret Doors
Some procedural branches are not visible from the entrance. The Emberville region guide that experienced runners share in community chats calls out three telltale signs: a wall with no torch sconce, a floor tile that is one shade lighter than its neighbors, and a draft sound effect that does not match the corridor's lighting. Each of those is a flag for a hidden room, and hidden rooms almost always carry the run's best crafting material. Skipping them is safe, but banking the materials from them is how a tier-three expedition pays for the gear that lets you survive a tier-five push the next day.
Emberville Procedural Generation and How the Map Reshapes
The most common question after a few runs is "emberville how procedural generation works" in plain terms. The answer, pulled from the official press materials and confirmed by community testing, is that the Vitromotus uses a seeded branching system layered over a hand-authored biome skeleton. Each region has a fixed entry and exit, but the corridors between them are assembled the moment you walk in, using your previous room choices, the time you spent in the dungeon, and the depth tier you have already reached as inputs.
| Generator Input | Effect on the Map |
|---|---|
| Run depth tier | Raises enemy density and loot rarity |
| Time inside dungeon | Triggers "pressure" rooms with extra adds |
| Doors opened on this run | Unlocks alternate branches for next run |
| Death and respawn | Resets shortcuts but keeps unlocked shortcuts |
| Class currently equipped | Adds class-themed room variants |
The first three inputs are the reason the Emberville procedural generation system feels alive. Open a door the layout did not expect, and the generator rewards the curiosity with a branch you would not have seen otherwise. That is also why the Emberville full map community wiki is never finished: there is no single full map, only the skeleton that the branches hang from. The official Emberville press release on Terminals frames every expedition as something that "shapes the future of a thriving settlement," and the procedural map is the literal version of that promise.
Why No Two Runs Match
Even with the same class, the same starter gear, and the same depth target, two runs rarely share more than three rooms in a row. The generator seeds a new layout every time you cross the surface gate, and any choice you make inside — opening a side door, killing a specific mini-boss, lighting a torch in a Hush Alcove — nudges the next room's template. Over a thirty-minute run, those nudges add up to a dungeon that feels authored for the choices you actually made. That feedback loop is what makes the dungeon crawler half of Emberville feel like a conversation rather than a maze.
How the Map Reshapes After Death
Death in Emberville is a setback, not a reset. According to the Emberville combat and death mechanics guide, the game treats death as a soft checkpoint that respawns you at the rebuilt town with most of your loot intact. The procedural map, however, does reset fully on respawn. Shortcuts you already unlocked stay unlocked, but the corridor layout behind them is regenerated, which means the Emberville full map for a single playthrough is a chain of snapshots rather than a single continuous drawing. Veteran runners bank the shortcut stairs first and only then start the real expedition, because shortcuts are the only layout element that survives a death.
Emberville Dungeon Crawler Strategies by Depth Tier
Reading the map is one thing; surviving it is another. The Emberville dungeon crawler side of the game rewards builds that can adapt to whatever the generator throws at the player, and the cleanest way to build that adaptability is to plan around the depth tier rather than the biome.
| Depth Tier | Recommended Class Focus | Stamina Budget | Loot Priority |
|---|---|---|---|
| 1-2 | Any starter class | Generous | Crafting materials, basic weapons |
| 3 | Class with mobility tools | Moderate | Ember shards, slag for forging |
| 4 | Hybrid class with ranged option | Tight | Glassroot, dust for upgrades |
| 5 | Tank or curse-resistant build | Very tight | Echo tokens, relic bones |
| 6+ | Fully geared main or co-op squad | Critical | Voidsteel, legendary cores |
These budgets come from community testing and the official description that frames Emberville as a dungeon crawler where "death no longer lasts." That line is the key strategic constraint: the dungeon is not punishing in the roguelike sense, it is punishing in the gear-check sense, and a tier-six push on a tier-three kit will erase the run.
Tier 1-2: Learn the Room Tags
The first two tiers exist to teach you the room tag system from the previous section. Spend your stamina on opening side doors, light every torch in a Hush Alcove, and learn what a Cradle Room chest looks like before it bites. By the end of a tier-two run, the procedural map should feel readable rather than random. New players who skip this step and rush into tier three tend to be the same players who leave the Emberville beginner guide half-finished, and that combination is the most common source of early frustration.
Tier 3-4: Bank Loot, Not Kills
The gear-check wall is real. Tier three is where most runs end for unprepared players, and tier four is where the Emberville full map of your expedition starts to branch in ways the generator does not telegraph. The right move here is to ignore kill count and focus on banking ember shards, slag, and any Glassroot you can carry. Materials bank at the shortcut stairs and survive a respawn, while a sloppy kill in a tier-four Glassroot Cavern often costs more stamina than the loot is worth. Treat tier three and four as shopping trips, not boss attempts, and tier five becomes a different game.
Tier 5-6: Bring the Right Build, Not the Best Build
By the time you reach the Hollow Choir and the Vitromotus Core, the procedural generator has stopped offering training wheels. The right build for these tiers is whichever of your classes can handle curse stacks, silence effects, and boss-tier patrols in the same expedition. Most community-tested runs bring a hybrid class for tier five and a fully geared main for tier six, which is also the bracket where co-op starts to pay off. Players who push solo into tier six with a glass cannon build are also the players the Emberville progression guide warns against, because the gear and the build both have to be ready at the same time.
Reading the Emberville Full Map Between Runs
The Emberville full map is not a single screenshot; it is a layered log of every run you have ever completed. The game tracks which shortcuts you have unlocked, which biomes you have visited, and which branches the procedural generator has shown you in previous runs. That history is the reason the dungeon crawler side of Emberville never feels finished, even after dozens of hours.
| Map Layer | What It Tracks | Player Use |
|---|---|---|
| Shortcut Log | Unlocked stairs and doors | Plan safe retreat paths |
| Biome History | Visited regions and depth reached | Avoid dead-end branches |
| Loot Table | Materials banked per run | Schedule crafting runs |
| Room Tag Memory | Last seen room pattern | Predict next room type |
| Death Log | Where and why you died | Adjust next run's route |
These five layers turn the Emberville region guide into a personal handbook rather than a static reference. The more runs you log, the more the procedural generator hands you corridors that match your habits, and the more the game starts to feel like it is reading your playbook back to you. That feedback loop is also why the Emberville full map community wiki keeps growing: every player carries a slightly different set of those layers.
When to Stop Pushing and Bank
The single most important read on the Emberville full map is the stamina budget at the next depth tier. If the corridor ahead is unknown, the room tag is unreadable, and your stamina is below half, the right move is to bank at the nearest shortcut stair and return to town. Banking early is the habit that turns a tier-four run into a tier-five run the next day, and it is the habit that the Emberville map and quest guide repeats because so many new players push one room too far and reset their whole expedition.
Co-op and the Shared Procedural Map
Co-op runs share the same procedural seed for the host's instance, which means the map is consistent for everyone in the party but different from any solo run the guests have played. That shared seed is also why co-op is the fastest way to learn the Emberville full map: a single expedition with an experienced host can expose a guest to room tags, biome branches, and shortcut placements that would take three solo runs to find. Co-op is not required to finish the game, but it is the most efficient way to learn the procedural generation system in a single sitting.
Frequently Asked Questions
What is the Emberville biome guide and which biomes does it cover?
The Emberville biome guide covers the six major regions of the Vitromotus: Sunken Threshold, Mossgrove Hollow, Cinder Atrium, Glassroot Caverns, Hollow Choir, and the Vitromotus Core. Each biome is a procedural region with its own hazards, loot table, and depth tier, and they are the structural backbone of any dungeon crawler run.
How does Emberville procedural generation work in practice?
Emberville procedural generation uses a seeded branching system layered over a hand-authored biome skeleton. The generator reads your previous room choices, the time you have spent in the dungeon, your current depth tier, and your equipped class, then assembles the next corridor from a pool of room templates. That is why no two runs of this dungeon crawler ever share the same full map.
Is there a single Emberville full map I can study?
There is no single Emberville full map because the procedural generator rebuilds the corridors every run. The closest reference is the biome skeleton, which lists the six named regions and their typical depth tier, and that skeleton is what the Emberville region guide is built around. Shortcuts you unlock are the only layout element that survives a death.
What is the best depth tier for a new Emberville dungeon crawler player?
Tiers one and two are the best depth tier for a new Emberville dungeon crawler player because they teach the room tag system without the gear-check pressure of tier three. Most community-tested new-player runs spend the first two expeditions learning room tags in tier two before pushing into Cinder Atrium for the first gear upgrade.
Does death reset the Emberville procedural map?
Death resets the procedural map fully, but it does not reset the shortcuts you have already unlocked. The dungeon crawler treats death as a soft checkpoint that respawns you at the rebuilt town of Emberville with most loot intact, which is why banking materials at shortcut stairs is the most reliable way to keep your expedition progress between runs.