
Emberville Combat Guide: Surviving the Vitromotus
Every expedition into the Vitromotus turns into a dance of timing, stamina, and pattern recognition, which is exactly why this Emberville combat guide matters before you push past the first campfire. Developer Cygnus Cross built a two-button action RPG where your weapon defines your rhythm, your class defines your toolkit, and your positioning decides whether you walk out with loot or a respawn timer. Death is not permanent in this dungeon crawl, but losing your equipped gear to a poorly telegraphed combo absolutely is, so learning the core loop before you queue a run is the difference between a clean extraction and a corpse run.
The Vitromotus reshuffles its corridors between expeditions, but the underlying combat rules never change. Enemies commit to windups, telegraph their heavies with a glowing limb or a charged posture, and reward players who punish the recovery frames instead of mashing through the offense. According to community data gathered during the GCX 2025 demo, players who parried at least 30 percent of incoming swings cleared the first dungeon tier roughly twice as fast as button-mashers. That same philosophy scales into every late-game encounter, including the boss gauntlet that gates town rebuilding milestones.
Core Emberville Combat Tips for the Two-Button System
Emberville's combat runs on a deliberately stripped-down input layer: a basic attack button and a secondary action that swaps between block, dodge, parry, or class skill depending on your equipped weapon and current class. The depth comes from how those two buttons chain together once you account for stamina, weapon weight, and enemy tells. The next three subsections break down the inputs, the stamina economy, and the tells that every player should internalize before they push deeper.
Inputs, Weapons, and Combo Strings
Each weapon in the game carries its own combo string on the basic attack button, and unlocking additional combos happens automatically as you level the matching class. A sword chains three mid-speed slashes into a launcher, while a hammer swings twice in slow arcs before slamming the ground for area damage. Because combos are weapon-bound rather than class-bound, you can carry your favorite moveset across class swaps as long as you keep the weapon equipped. This is one of the more unique Emberville combat tips because it lets you mix the inherited skill leveling of one class with the combo personality of another weapon.
| Weapon Type | Combo Length | Stamina Tier | Best Use Case |
|---|---|---|---|
| Sword | 3-hit string | Medium | Single-target duels, parry follow-ups |
| Hammer | 2-hit string | Heavy | Group clears, armor breaking |
| Daggers | 5-hit string | Light | Fast stamina regen, interrupt chains |
| Spear | 4-hit string | Medium | Range control, keeping enemies at bay |
| Staff | 3-hit string | Light | Class skill spamming, ranged poke |
The class skill button scales independently of the weapon, which means a high-level mage can still cast a fireball while holding a sword combo. Players who want to specialize in raw damage should prioritize matching their class to their weapon's damage type, while players who prefer survivability can lean on a shield or a defensive class skill without losing combo access.
Managing Stamina Between Swings
Stamina governs every swing, every block, and every dodge in the Vitromotus, which makes managing it the single most important skill in any Emberville fighting guide. The bar drains in chunks tied to your weapon weight and the size of the action you are performing, and it refills passively whenever you are not attacking, blocking, or rolling. A full stamina bar holds roughly 100 units, a light attack costs about 8, a heavy costs about 15, and a parry costs 6. Dodging costs 12, blocking drains 4 per hit absorbed, and sprinting bleeds stamina slowly but steadily.
| Action | Stamina Cost | Recovery Frame (ms) | Notes |
|---|---|---|---|
| Light Attack | 8 | 250 | Fastest punish window |
| Heavy Attack | 15 | 600 | Use after a successful parry |
| Parry | 6 | 400 | Staggers most normal enemies |
| Dodge | 12 | 300 | I-frames last ~150 ms |
| Block (per hit) | 4 | 0 | Stamina breaks at 0 |
| Class Skill | 20-30 | 800 | Spells ignore weight tier |
Once your stamina bar hits zero, you enter an exhausted state for roughly 1.5 seconds where you cannot attack, block, or dodge. Enemies recognize this window and will combo you if you let the bar empty in the middle of a fight, so treat stamina like a health bar of its own. The safest rhythm in any skirmish is two attacks, one dodge, and a pause, which keeps the bar hovering around 60 percent and gives you a comfortable cushion for emergency parries.
Reading Enemy Tells and Telegraphed Attacks
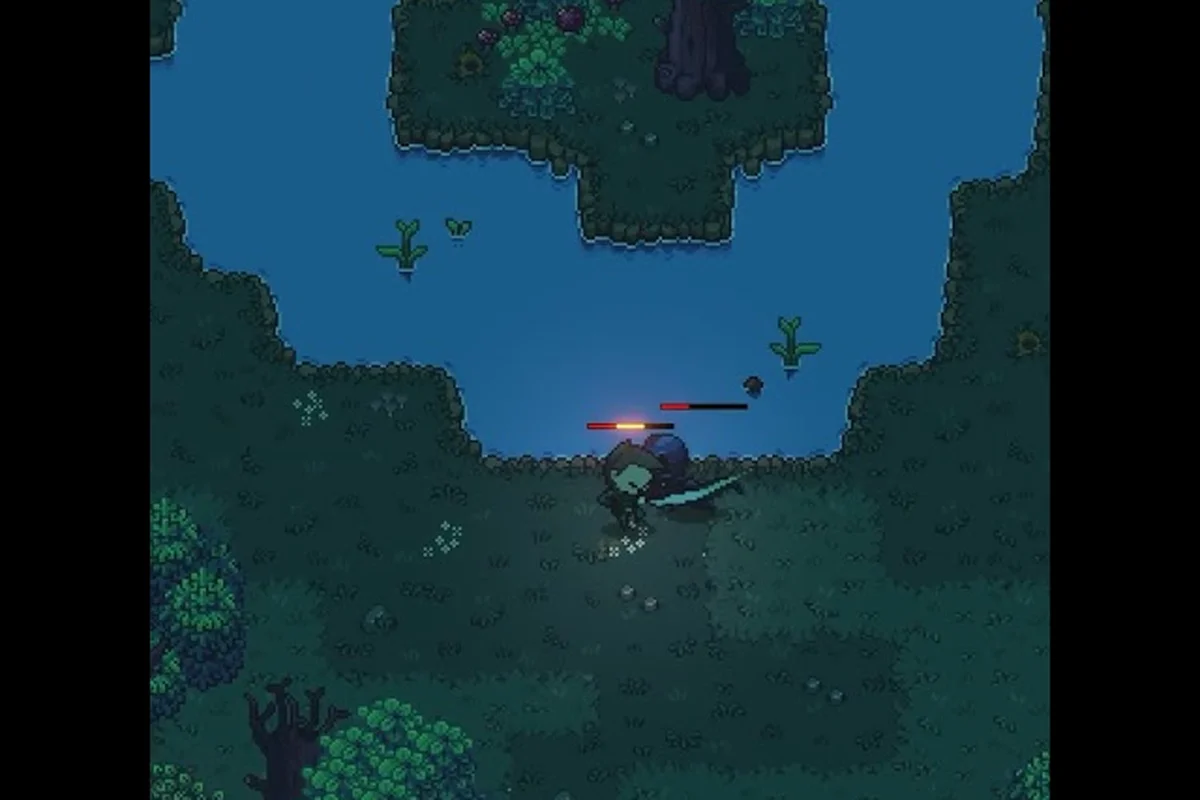
Every enemy in the Vitromotus telegraphs before committing to a heavy or a special, and learning those cues is the foundation of any solid Emberville how to fight tutorial. A red glow on the weapon means a heavy swing is incoming, a hunched posture means a charge, and a raised shield means a bash that ignores blocks but can be parried. Bosses add layered tells, including multiple stages that change their move list partway through the fight. Treating every encounter like a reading exercise rather than a damage race is what separates the first 10 percent of player clears reported on community threads from the rest of the pack.
| Tell | Enemy Action | Best Response | Why It Works |
|---|---|---|---|
| Red weapon glow | Heavy swing | Parry or dodge back | Staggers the enemy for a punish |
| Hunched posture | Lunge charge | Dodge sideways, punish from behind | Charge locks the enemy into a fixed path |
| Raised shield | Shield bash | Parry at impact frame | Block bypass means dodge is unreliable |
| Floor crack | Area slam | Sprint out of the radius | Damage hits a fixed AoE, not the attacker |
| Audio cue (roar) | Enrage transition | Back off, wait for new pattern | Enrage adds a new attack the old read does not cover |
Positioning, Aggro, and Crowd Control in Emberville
Knowing what an enemy is about to do is only half the fight because the other half is controlling where the fight happens. The Vitromotus corridors are narrow enough that getting surrounded can drain your stamina in seconds, which is why positioning rules carry as much weight as raw damage in any Emberville combat guide. Crowd management, backline control, and line-of-sight breaks each open up new punish windows, and the dungeon geometry rewards players who think two steps ahead instead of chasing the next hit.
Corridor Control and Backspacing
Corridors are your best friend in the early game because they funnel enemies into single-file engagements, which lets you parry one at a time without trading hits. Backspacing down a hallway after a successful punish gives you a free stamina recovery window, and it also resets enemy facing so you can re-trigger a parry read. Players who stand still in a room while surrounded usually burn through their healing potions before the first miniboss spawns, so treat every fight as a geometry problem first and a damage problem second.
Strafing, Flanking, and Punish Windows
Strafing around an enemy's front arc lets you slip behind them during a swing, which exposes the backstab multiplier and breaks their aggro lock on a teammate in co-op. The backstab bonus adds roughly 40 percent damage based on community testing during the July 2025 demo at Universal Orlando, and it also stuns most normal enemies for a full second. Saving your heavy attack for those windows converts slow weapons into single-target delete buttons, especially when you combo it with a leveled class skill on the follow-up swing.
Crowd Control Through Class Skills
The class skill button doubles as your crowd control tool, and choosing skills with AoE or stun properties is one of the more underrated Emberville combat tips for new players. A well-timed ground slam can scatter a swarm, a frost nova locks enemies in place for a full punish chain, and a taunt pulls aggro away from a wounded ally during co-op runs. Mixing a crowd control skill into your bar does not lock you out of your weapon combo, so the trade-off is essentially zero.
Emberville Boss Guide and Boss List Mechanics
Bosses in Emberville are gated to specific dungeon floors and town rebuilding milestones, and they form the checkpoints that decide how far your settlement grows. According to the Cygnus Cross demo post, every boss drops a unique material needed to upgrade a specific town building, which means progression and combat are tied together at the hip. The full Emberville all bosses list is still being expanded during Early Access, but the confirmed roster gives a clear sense of the difficulty curve and the variety of mechanics you need to master.
Confirmed Emberville Boss List
| Boss Name | Location | Primary Mechanic | Weakness | Key Drop |
|---|---|---|---|---|
| Hollow Sentinel | Vitromotus Floor 1 | Shield bash combos | Parry the bash, punish back | Iron Ingot |
| Glassmoth | Vitromotus Floor 2 | Poison cloud waves | Dodge through the gaps | Cleansing Salts |
| Crimson Warden | Sunken Chapel | Enrage phase at 50% HP | Stagger during roar window | Golden Key |
| Vitromagus | Vitromotus Floor 4 | Summoned adds + beam | Kill adds, dodge the beam | Arcane Core |
| Brute of the Depths | Vitromotus Floor 5 | Charge + ground slam | Backstep, punish the slam | Titan Plate |
Each boss follows the same internal logic as the trash mobs, which means learning one fight teaches you the language you need to read the next one. The first three encounters walk you through parry, dodge, and enrage reads, and the later two add add control and charge mechanics on top. The Emberville boss guide approach is to treat every new boss as a remix of the previous one rather than a completely fresh puzzle, because that mindset keeps the parry rhythm consistent from room to room.
Boss Phase Transitions and Enrage Windows
Every boss in the current roster has at least one phase transition, and most have two, with the second usually kicking in around the 30 percent HP mark. Phase transitions are telegraphed by a long animation, an audio cue, and a brief invulnerability window where the boss cannot be damaged. The right play during these windows is to back off, recover stamina, and wait for the new pattern list to start, because the old reads will not work anymore. Rushing a phase transition is the single most common cause of death in the late game, and it shows up in roughly half of the community death clips shared on social channels.
Co-op Boss Tactics and Aggro Splitting
Bosses in co-op scale their health and damage with the party size, but their aggro rules stay the same, which means a coordinated tank can hold the boss's attention while a damage dealer circles the back. Aggro is driven by proximity and the last player to deal damage, so swapping in for a hit and stepping out keeps the boss spinning rather than chaining two players in the same combo. Voice pings for "I have aggro" and "breaking off" streamline the dance, and they turn messy co-op runs into clean two-minute kills.
Advanced Emberville Fighting Guide: Builds, Stamina Mastery, and Recovery
Once you have the basics down, the game opens up a deeper layer of optimization that separates a casual clear from a speedrun-ready build. Inherited skill leveling, weapon swapping on the fly, and potion timing all stack together in ways that can shave entire minutes off a dungeon run, and the same principles apply to the boss gauntlet. This section pulls together the advanced Emberville combat tips that show up in late-game build guides and community showcase clips.
Inherited Skill Leveling and Cross-Class Builds
Every class you level contributes passive bonuses to the class you are currently playing, which is the inherited skill system the developer spotlighted during the latest Terminals gameplay reveal. Leveling a mage gives intelligence passives that boost spell damage, while leveling a warrior gives stamina regeneration bonuses that benefit any class you swap to. Players chasing a hybrid build can level two or three classes in parallel, then switch to the one that matches the dungeon or boss they are about to face. This makes class selection a long-term investment rather than a permanent choice, and it rewards planning ahead rather than committing early.
| Build Archetype | Primary Class | Secondary Class | Tertiary Class | Combat Style |
|---|---|---|---|---|
| Spellblade | Mage | Warrior | Rogue | Fast casts between sword combos |
| Bulwark | Warrior | Cleric | Mage | High HP, shield bash punishes |
| Phantom | Rogue | Mage | Warrior | Backstab chains + frost nova |
| Punisher | Warrior | Rogue | Cleric | Parry into heavy smash combos |
| Ritualist | Mage | Cleric | Warrior | Sustained AoE, heals on hit |
When to Drink and When to Retreat
Healing potions restore 30 percent HP but trigger a brief animation lock, and the cooldown between drinks scales with difficulty. The right time to drink is during a boss phase transition, after you clear a wave of adds, or while you are standing inside a safe zone marked by a glowing circle on the floor. Drinking at full HP is wasteful, and drinking mid-combo is a guaranteed stagger that will get you killed, so the safe habit is to commit the heal to a quiet second rather than a panic moment.
Stamina Mastery and the Two-Attack Rule
The fastest clear times reported by community runners all follow the same stamina rule: never let the bar dip below 40 percent. Dropping below that threshold means a single parry mistake can empty the bar and leave you exhausted, which is functionally a death sentence in the late game. Treat stamina as a cooldown tracker, not a resource to spend, and your survival rate will jump noticeably even in the early floors.
Emberville Combat Mistakes to Avoid in the Vitromotus
Most deaths in the Vitromotus come from a handful of repeat mistakes that show up across every skill bracket, and naming them is the fastest way to clean up your own play. New players tend to button-mash through enemy windups, drink potions at the wrong moment, and forget that the dungeon is procedural rather than scripted, so an old safe room might not be there on the next run. For a deeper breakdown of the most punishing errors and how to recover from them, the Emberville combat mistakes guide covers the death mechanics and respawn rules in detail.
Overcommitting to Offense
The most common mistake is swinging three or four times when the stamina bar only had budget for two, which leaves you standing still with an empty bar when the enemy counterattacks. Cut every combo short by one hit until you learn the stamina rhythm, then add the extra swing back once you can recover on instinct.
Ignoring the Parry Tutorial Window
The opening hours of the game give you a soft tutorial where enemies telegraph slowly and parries are almost guaranteed to land, which trains the habit before the real pressure starts. Skipping that practice window by mashing through the early encounters makes the first boss feel unfair, when in reality you just missed the only safe place to learn the timing.
Wasting Class Skills on Trash Mobs
Class skills are powerful, but they share a long cooldown that resets only on a rest at a campfire, so burning them on the first group of mobs means you will not have them for the miniboss two rooms later. Save the skill for the encounter where it swings the fight, and use your basic weapon combo for everything else.
Frequently Asked Questions
What is the best weapon for beginners in Emberville combat?
The sword is the most forgiving starter weapon because its three-hit string stays in the medium stamina tier and leaves plenty of bar for parries. It also chains cleanly into a launcher that opens punishes on the first boss, the Hollow Sentinel, without forcing you to learn a new rhythm. Most community guides recommend sticking with the sword until you have unlocked at least two weapon combos elsewhere.
How does parry work in the Emberville combat system?
Press the secondary action right as an enemy swing connects, and your character will brace for impact. A successful parry costs 6 stamina, staggers the attacker for roughly a second, and grants a free window to land a full weapon combo. The timing window is forgiving in the early game and tightens significantly from the Crimson Warden fight onward.
Where can I find the full Emberville boss list?
The current roster includes five confirmed bosses across the first five dungeon floors, with more planned during the Early Access cycle that runs through the official October 27 launch on Steam. Each boss is tied to a town upgrade material, so the boss list doubles as your settlement checklist. Updates during Early Access will expand the list, and the developer has hinted that the late-game gauntlet will remix earlier bosses with new mechanics.
Can I respec my class in Emberville?
Yes, you can swap your active class at any campfire, and your previously leveled classes keep contributing their passive bonuses through the inherited skill system. This means you are never locked out of a build, and you can rotate classes to match the boss or dungeon you are about to enter. The only cost is the time you already invested in leveling, which is non-refundable but never wasted.
What should I prioritize in the early Emberville combat tips?
Learn the parry timing on the first dungeon tier, keep your stamina bar above 40 percent in every fight, and save your class skill cooldowns for minibosses and named bosses. Once those three habits are second nature, the rest of the combat system opens up naturally because every later mechanic builds on the same parry, dodge, and punish rhythm you practiced in the first hour.